5 Worthwhile Augmented and Virtual Reality Tools
Interesting—and free—ways to use AR and VR in the classroom to create engaging learning experiences.
Your content has been saved!
Go to My Saved Content.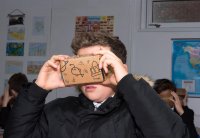
There was a time—not so long ago—when augmented and virtual reality seemed like they belonged in a science fiction movie. Now these emerging technologies are making their way into classrooms.
Quick recap: In augmented reality (AR), digital objects are superimposed in real-life scenes on a smartphone or tablet. Virtual reality (VR), by contrast, creates an entire virtual world that fully surrounds the individual—a person holding their smartphone or tablet, or wearing a VR headset, can turn in all directions, or look up or down, and see that part of the virtual world on the device.
One of the obstacles to implementing AR and VR is the high cost of some of the products and the supplemental equipment needed. However, costly merchandise is not the only way to bring these technologies into the classroom. The following five tools offer AR and VR experiences that are free and do not require extra equipment.
Story Spheres
Story Spheres is a website that pairs virtual reality with digital storytelling by letting students create VR experiences. The website enables students to upload a 360-degree image—they can select one they have taken themselves or use one downloaded from a Creative Commons website.
Once that’s uploaded, a student can begin to customize their VR experience, adding songs, sound effects, and narration. For students writing a narrative, Story Spheres is a creative way to present their work to the class. Students could use the 360-degree image to display a setting and use the sound effects to both narrate and capture the mood of their work. Students studying historic sites can show an image of that location and use the sound tool to provide facts and other information.
HistoryView VR
HistoryView VR offers free virtual reality tours of many national and international historic sites. Whereas some websites offer only a few free tour options, all of HistoryView’s tours are free.
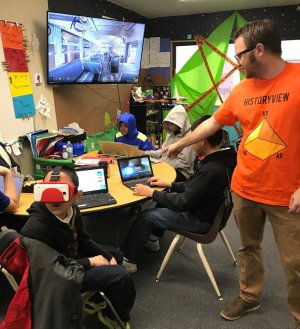
Students can use their device to click through museums, national parks, government buildings, and other landmarks. Each VR tour is equipped with touchpoints the students can select to learn more about the location. For example, environmental science classes could visit the Amazon rain forest or the satellite for NASA’s Operation IceBridge. History classes studying ancient civilizations could visit the Roman Colosseum, and students in American literature courses can visit the Mark Twain house.
These tours are accessible with any VR headset, but the extra equipment is not required—students can view the tours using their tablet or laptop.
Metaverse
Metaverse is a combination of a phone app and a website. Using the website, students can create their own AR experience using a variety of backgrounds, characters, and other objects.
Students can choose from 2D and 3D images, as well as animated 3D objects and characters. Sounds and speech bubbles with text can also be added. It does take some time to learn the tricks and options, so teachers should try to give students time to explore and get comfortable with the tool before diving into a project.
When a student is finished with their creation, they can print a QR code that peers can scan to see the work. For students in an English class reviewing a book they’ve just read, Metaverse can be used to create an AR object that represents something of significance from the text. Using sound files, students can narrate a review or a summary of the book.
Tour Creator
Tour Creator is a product from Google that allows students to create their own versions of Google Expeditions—they can make VR tours to share with their peers.
Tour Creator allows students to pull images from Google Maps’ Street View—they can search for an address or city and select the 360-degree images they would like to add to their tour. Each location selected is called a scene, and within each scene, students can add background music, notes for their classmates, or points of interest—touchpoints that draw the eye of the viewer to a specific part of the image where the student has provided more information, sound effects, or images to educate their peers.
For example, in an earth science VR experience, a student may create a touchpoint to explain a rock formation in the location they have chosen. Students can also create literature trips, following characters in a story and creating a VR tour with touchpoints for each location referred to in a book.
Panoform
Panoform pairs real-life drawings with VR experiences. To get started, the teacher prints out a grid template for students, who are free to draw and design on the grids. Once a student has finished their design, they take a picture of the grid and upload the picture to Panoform’s website, where they can view their design as a VR experience either on a VR headset or their phone or other device. For example, students can draw molecules in a chemistry class or diagram an organism in biology.
With these five tools, students can use augmented and virtual reality tools in the classroom—all without the need for expensive equipment.