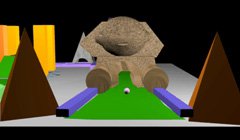
Lesson 5: Using 3-D Software to Render Golf-Hole Designs
Teach students how to turn their golf-hole designs into cool graphics and animations.
Download Lesson 5 (68KB)

Lesson Objectives and Materials
Objectives
- To learn 3-D-modeling software or to become more proficient using it
Materials
- 3-D-modeling software or graphics-arts software, such as Autodesk 3ds Max, or Autodesk Revit Architecture both available for free to students through the Autodesk Student Community
- or Google SketchUp (free)
- computers to demo and work on
Engaging Students
Get your students interested in the lesson by asking them
- If they’ve ever used a 3-D program (assume many have not), and what they use the program for
- What they know about using computer programs. For example, what are computer programs designed to do? Explain the universal components found in most programs, including the program interface, tools, and applications.
- Who might use 3-D programs (e.g., animators, film artists, medical illustrators, architects, interior designers) and for what reason
Project Application: Using 3-D-Modeling Software
You don’t need to be an expert in graphics or 3-D-modeling software to help students use the application. All it really takes is a little playing around with the interface and tools to get comfortable with it. Most software programs come with free help tutorials. (See Related Resources.) Refer to the tutorials when in doubt. Then explain the main tools and techniques to students and let them experiment with the software. Nowadays, kids usually pick up on this information quickly and don’t need much guidance.
Regardless of the program you use, here are some steps to help teach 3-D and animation software:
- Explain what 3-D software does.
- Show a video or graphic made from the software.
- If available, show a how-to movie about the software (often a part of the software’s Help menu).
- Explain important parts of the software’s interface, such as the pointer, move, zoom, pan, and animation tools.
- Demonstrate how to draw a cylinder or a square. Ask students to do the same.
- Present a complex graphic in orthographic views. For example, most graphic programs show the front, side, plan, and perspective views. What can you do in each view that you can’t in the others? Often, the front, side, and plan views provide accurate measurements, while the perspective view gives a good lay of the land.
- Ask students to draw shapes using Boolean logic (the algebra that allows the program to create 3-D graphics). Encourage students to name and save all objects they create.
- Demo how to integrate animation into the computer program.
- Let students experiment with the program. Then ask them to begin designing their holes using exact measurements and logic. In addition, they should render a movie that includes the path of the ball from starting position into the hole. Emphasize the following areas when working:
- Light
- Composition and color
- Animation speed
- Shapes
- Realism
- Project requirements (measurements, etc.)
Ask students to review and critique each other’s designs throughout the assignment using the questions from the previous lesson:
- What do you like most about the design?
- Is the model well built? Is the design clear and realistic?
- Is the hole challenging? Too challenging? Would you have fun playing the hole?
- Do you think it is possible to build this hole and play it in the designated area (such as in the gymnasium or classroom)?
- What areas do you think need improvement? You can base your suggestions on the questions above.
As with other lessons, ask students to incorporate feedback into their final product.
Student Assessment
At the end of this lesson, you should have a good idea of each student’s ability to use graphics software, process and apply new skills, and understand Boolean logic. Here are some guiding points to help assess each student.
Download Grading Rubric (364KB)
The student’s mastery of the subject matter is
Excellent: Students have become familiar with the software. They understand and use Boolean shapes, accurately represent their golf-hole design in 3D, and use the animation features to animate a ball rolling through the course.
Good: Students have become familiar with the software. They understand and use Boolean shapes and accurately represent their golf-hole design in 3-D.
Fair: Students have become familiar with the software. They attempt to use Boolean shapes, but do not fully understand them. Students represent their golf-hole design in 3-D, but there are errors in scale or composition. Students do not complete the illustration.
Poor: Students fail to become familiar with the software and struggle to understand the interface.
Key Points
Are some students picking up software skills more quickly than others? Ask them to help the students who are having trouble.
Related Resources
- Autodesk 3ds Max: An industry-standard program that design professionals commonly use for 3-D modeling. Architects use Max to create realistic models of their designs, which they can move around in space and test for structural viability.
- Autodesk Revit Architecture: Another industry-standard program that design professionals commonly use for project planning. Architects use Revit for building information modeling (BIM), a way to calculate water and energy use to create more sustainable buildings.
- Google SketchUp: SketchUp allows you to create, modify, and share 3-D models for free. The software is compatible with Mac or PC operating systems, and students can use it at home and in the classroom.