Year One With a 3D Printer: 17 Tips
Here are 17 tips, both technical and pedagogical, to help you navigate your first year of incorporating a 3D printer into your classroom projects.
The 3D printing industry is expected to exceed $21 billion by 2020. Classrooms are joining in. Kelly Hines' fifth-grade classroom is redesigning a prosthetic hand. Can't buy a drone? Soon, you may be able to print one. You can print robots, math manipulatives, and even parts for a 3D printer. (In fact, Bryan Byer's science classroom in Michigan built their own 3D printer.)
What will happen when we can 3D print things from door stoppers to wind turbines to (wait for it) wedding dresses? This past year, my students and I began our journey after I saw the FabLab at Kentucky Country Day School last summer.
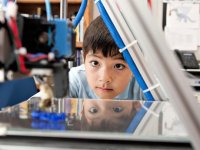
Me and Bob Marley
I will admit that "Bob Marley" and I had a rocky relationship. That's what I named my 3D printer, a Makerbot 3D Mini, which I got in September. It took me three months to figure out a nozzle problem -- I could print items, but he would jam and smoke all the time. (Thus, the nickname.) MakerBot sent me a new nozzle, and since January, we've been jammin' in amazing new ways.
Here's some advice learned during my first year with a 3D printer.
Technical Tips
1. Find a video about loading the filament properly.
After an hour of frustration with the written directions, I watched a video and did it perfectly.
2. Make sure the feeder tube is long enough.
On my MakerBot, a white tube takes the filament from the spool at the back to the nozzle. When we printed something large, I had the white tube too short; the tension pulled the nozzle off and stopped the print job.
3. Call the manufacturer when you need help (don't wait).
If you have problems, pick up the phone. These printers have new issues that arise all the time. The sooner you call, the faster you can jam in a good way.
4. Keep fingers away from the inside of the printer.
When loading most printers, a thread of super-hot filament drips out of the nozzle. You'll need a simple way to remove this excess before printing. The biggest rule is "Hands off!" The 3D printer nozzles that use heat will burn the skin! (Reputable companies put the printers in a protective case.) After printing, students will want to open the door immediately and get the item. Don't! Let it cool a bit. If you can, pull out the tray and remove it with the paint scraper.
5. A curiosity cabinet keeps hands and fingers away from the printer.
Student curiosity is normal, so meet it! Keep a basket of 3D printed items on the shelf near your printer, ready to share.
6. Play with the resolution.
When I printed a cup, it felt stringy. I was shocked that it wasn’t like the smooth one that Josh Ajima gave me at ISTE 2014. These problems weren't with the printer, but rather the print setup. There are three kinds of quality settings on most 3D printers:
- Layer resolution is how thick the layers are. Smaller layers make a smoother, stronger exterior. It also uses more filament and takes longer to print. (Lower numbers = higher quality.)
- Fill density is how full of filament the inside of the 3D object is. A hollow object will collapse. The inside of most 3D printed objects look like a honeycomb. The higher the percentage of fill, the smaller the combs, and the longer it takes to print. A 100-percent fill will print a solid object. (Higher numbers = higher quality.)
- Wall thickness refers to the item's outer wall. The larger the thickness, the sturdier the wall. The minimum wall thickness depends upon your material, so check your manufacturer's recommendations. (Higher numbers = higher quality.)
7. Always attend the printer.
When you print, don’t sprint -- be nearby. Print during the school day. I start print jobs in homeroom and let them print through the day. Printing overnight is not a good idea for a beginner, so be careful.
8. Order filament in a variety of colors.
Students can paint the item if it is clear or white, but they often want to print in a variety of colors. Print all the items of one color before you change the filament spool, as you want to change those spools as infrequently as possible.
9. Combine the smaller parts of a print job.
Small parts require lots of short prints. If you teach a class, you just don't have time to stop and start another print. Here’s how you solve this problem. Even if only one computer will be printing, install the software on every computer. Have students combine the smaller items into one print job. This will let you print many of the items at one time. After students prepare their print jobs, they can save them to a shared folder or email them to the teacher.
10. Organize your printing.
You have four big decisions to help you get organized:
- How will students submit work?
- How will you approve work or give feedback?
- How will students revise work?
- How will you organize your print jobs efficiently?
11. Invest in two nozzles.
"Bob Marley" taught me that when you have two nozzles and one jams, you should be able to switch it out with a second nozzle to keep printing.
For more helpful info, I recommend reading Kathy Schrock's 3D Printing in the Classroom webpage and Invent to Learn's Just-in-Time Guide to Classroom 3D Printing.
Pedagogical Tips
I didn't get serious about the teaching possibilities of the 3D printer until I could get consistent results. So work out the technical issues first:
12. Let students work in teams.
The first thing that students will want to do is print individual items to take home. But 3D prints can take a long time, so I had students work in teams of three or four.
13. Start with premade items.
Students selected an item with moving parts on Thingiverse. Then, they took the smaller pieces and combined them (see tip #9). Just because something is too big for your printer doesn't mean that you can't use it. Students can scale the work down (and learn some math).
14. Use boxes to keep work organized.
If you use moving parts or print items, have small boxes handy labeled with team names. The things you print can "walk off" if you're not careful.
15. Let students use software that's comfortable for them.
Most 3D printers can import any kind of .STL file. You can use the software that came with your printer, but don't stop there. Free programs including Google Sketchup might be easier. Let students test and compare the programs. Some mobile apps let you design with a simple swipe.
16. Plan longer-term projects.
If you taught in the days when classrooms had only one computer, you'll remember how we used to plan. Students "took turns." Think of 3D printers in the same way. If you have a class of 30 students working in teams of five, you'll need at least six days of class time.
You can also integrate with Genius Hour or 20 percent time. Give each team a day with the printer. Just remember that it's unlikely they'll be able to start and finish a print in one class period.
17. Learn together.
3D printers are still new. Let students explore with you. Learn together. This is their future and yours. This disruptive technology will change everything from fashion to car parts.
Now, me and "Bob Marley" jam every day in the best way. I'm a 3D printer fan and have only just begun to learn with my students.